Are mousetraps good for anything more than catching mice?
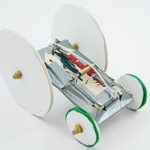
Actually, yes. Mousetraps can be used to power a car!
This project results in a simple mousetrap car. It probably won’t go very far or fast, but you can see how stored, potential energy is converted into kinetic energy.
When you’re finished with this project, you can try building more complex mousetrap car designs with the suggestions listed at the end of the article.
SAFETY NOTE: Mousetraps are dangerous! If one snaps back on your hand it could break a finger. This project requires adult permission and supervision.
1. Cut four wheels out of a piece of foam board or corrugated cardboard (adult supervision is necessary).
2. Make the back wheels about double the diameter of the front wheels. (Use a compass to draw the circles, or trace around a bowl or cup.)
3. Give your wheels some traction by stretching large rubber bands around each wheel. For the small wheels, you could also try using a section of a balloon.
4. Remove any metal or plastic teeth on the mousetrap with pliers.
5. Remove the rod that is used to set the trap.
6. Cut a piece of strong cardboard so that it is slightly larger (about 1/2″) than the mousetrap on every side. This is the base of the car, known as the chassis.
7. Attach the mousetrap to the chassis, using duct tape. Don’t cover up the spring in the middle of the trap or the “snapper arm.”
8. Screw the eye hooks onto the bottom of the cardboard chassis, one in each corner. Use a ruler to make sure that the eye hooks are aligned with each other.
9. Cut the wooden dowel so you have two pieces that are both about two inches longer than the width of the chassis. These will serve as your axles that rotate the wheels.
10. Stick the dowels through the eye loops. Make sure that the axles are straight and that there is room for them to spin in the eye hooks.
11. Cut holes a little bit smaller than the dowel through the center of each wheel, then attach the wheels to the chassis. Put the large wheels on the back of the car, opposite the snapper arm.
12. Wrap a small rubber band around the axle on either side of each wheel so the wheels can’t fall off.
13. Tie a string very tightly to the snapper arm on the mouse trap. The string should be long enough to just reach to the back axle.
14. Pull back the snapper arm until it reaches the other end of the trap, carefully. (You may need help.)
15. Hold the snapper arm in place and wrap the string tightly around one side of the axle. Holding the string tightly, set the car on the ground and carefully let go of the trap – the string should be wound tight enough that it holds the trap in place.
16. Let go of the string (after making sure all hands are out of the way!). The trap will snap forward, propelling your car.
A set mousetrap is full of potential energy which, when released, is converted to kinetic (motion) energy. The design of your car allowed that energy to be transferred to the axle to make the wheels turn. When the trap snapped closed, it yanked the string forward. As the string was pulled, friction between it and the axle caused the axle to rotate, spinning the wheels and moving the car forward.
There are many different ways to build a mousetrap car. Your simple model moves forward a few feet, but how could you design it to go longer distances? Or how could you design it to go faster? Here are some things to think about:
Other ideas for improving the car:
Welcome! Read other Physics & Engineering related articles or explore our Resource Center, which consists of hundreds of free science articles!